


Lightroom Color Grading Tutorial
In the end of this page you can find preset download button
Simple Picture :
This picture is a normal. There is no Color Grading and no any filter has been used. This picture is just taken from a simple mobile phone.
In Hinglish:
Ye aek normal picture ha. Isma koi color grading ya filter use nhi kiya hua. ye picture just aek simple mobile se li hui ha.

We will color grade it.
Step no 1 :
Import your picture in Lightroom app.
In Hinglish:
Apni picture ko lightroom app ma import kar lena ha
Lightroom app :
Step no 2 :
First go to light section and adjust it.
In Hinglish:
Pehle aap logo ne light wale section ma jaake isko adjust kar lena
Exposure -0.20Contrast +20Highlights -35Shadows +25Whites +15Blacks -20


Step no 3 :
Setup Curves like the pictures given below
In Hinglish:
Curves ma jaa ke curves ko kuch is tarah se set kar lena ha


Step no 4 :
Go to the color section and adjust as i told in below
In Hinglish:
Color section ma jaa ke isko adjust karlena jis tarah se neeche ma ne bataya ha
Temperature -3
Tint +5
Vibrance +20
Saturation 0


Step no 5 :
In Hinglish:
Colors wheel ko kuch is tarah se adjust karlena ha


Step no 6 :
Go to Color mix section and adjust the colors
In Hinglish:
Color mix section ma jaa ke is ko bhi adjust kar lena ha
Red
Hue -10
Saturation 0
Luminance 0

Orange
Hue 0
Saturation -15
Luminance +15

Yellow
Hue +22
Saturation -76
Luminance -39

Green
Hue +85
Saturation -50
Luminance -25

Aqua blue
Hue +65
Saturation 0
Luminance 0

Blue
Hue -10
Saturation -25
Luminance +5

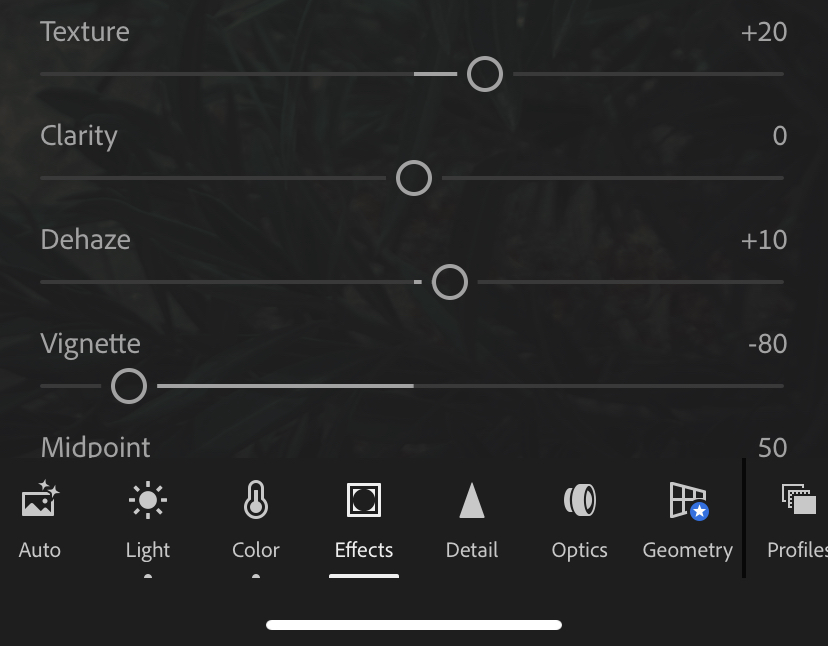
Step no 7 :
Now go to Effects and adjust
In Hinglish:
Ab aap ko Effects ma jaa ke isko bhi adjust karlena ha jese ma ne neeche btaya ha
Texture +20
Clarity 0
Dehaze +10
Vignette -80
Feather +100

Step no 8 :
Last step go to Detail and add some Sharpness
In Hinglish:
Aakhri step details ma jaa ke thodi si sharpness add karleni ha
Sharpening +20

Now you can see before and After
Ab aap Before and After look check kar sakte hain
Before

After

Preset
You can also use this preset on portraits
You can download this preset in free of cost it is portable for both nature and portrait photos aslo you the method of how to color grade your photos in lightroom app you easily make your own presets and use on your photos to save your precious time once you made your preset you can use it again and again it saves to time to edit manually. Manually it takes more then 30 minutes when you edit your picture carefully once you edit your photo and save your edit as preset it will be very useful to you for photo edit process.


0 Comments